Worldwide Sites
You have been detected as being from . Where applicable, you can see country-specific product information, offers, and pricing.
Keyboard ALT + g to toggle grid overlay
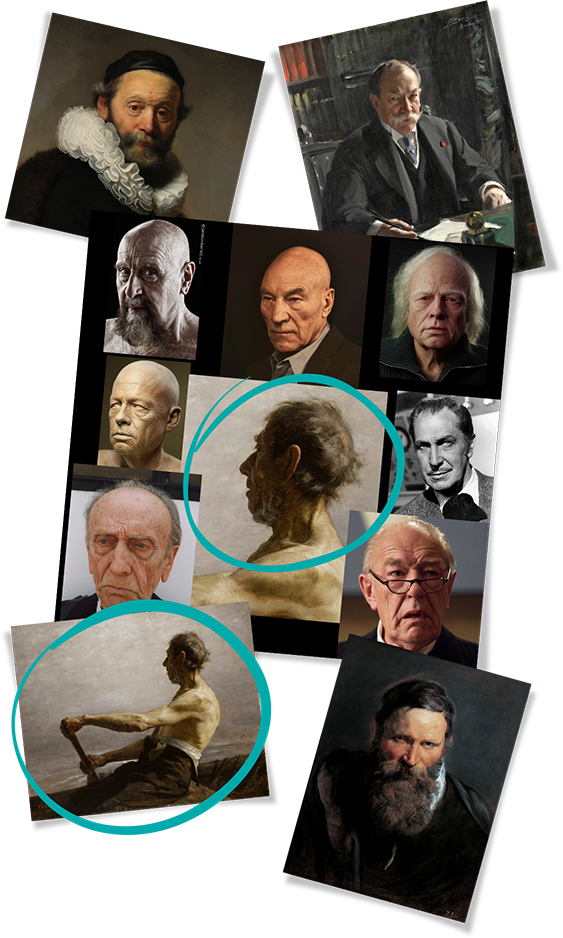
Reference paintings and photographs.
Arnold + Maya
Transferring an image from the mind to the screen is probably the hardest part of being a digital artist. You need to translate your thoughts, your vision, your emotion through a piece of software so that it accurately represents your vision. Having a set of tools and a workflow that eases that process is essential. Artists want to make art—not manage software.
The Arnold renderer is essential to my creative process. I started using Maya and Arnold as a student at Gnomon School of Visual Effects in Los Angeles, and my time there learning and being mentored by some of the best people in VFX helped me transition from my traditional arts background to computer graphics. Inspired by the old masters from the Renaissance, Neoclassical artists and some 20th Century illustrators, I’ve always sought to capture their knack for intensity, atmosphere and storytelling—no matter what medium. I’m constantly studying anatomy, trying to understand the nuances and subtleties of form, all the different layers to it, and making it as believable as possible. Then I hope to use that realism to provoke an emotion in the viewer.
Arnold allows me to drag the creative process out of my head and onto the screen. The ability to toggle my images back and forth between modeling solutions keeps the creative process moving. With Arnold I can make a major sculptural change, try different texture maps and endlessly tweak my assets to capture the right effect seamlessly with minimal effort, making the process of realizing my vision a pure joy.
Individual creative processes can’t be simply downloaded and applied effectively by any artist. Each person works differently to get the desired result. However, I wanted to walk you through the workflow I used to create this portrait using Maya and the Arnold renderer. My hope is that it sparks your own creative process for creating photorealistic CG characters.
Basic form
My process for creating a photorealistic sculpture is essentially a case study in using different modeling tools to get the desired authenticity of the human form. I’m constantly bringing my image in and out of my digital sculpting tool and Maya—sculpting each element in one tool and tweaking it in another with different textures, lighting and shading.
I use many of the sculpting tools in Maya, but I begin the sculpt in ZBrush. I start by sculpting all of the primary forms which establish the structure of the face. Then I move on to the secondary forms which define the details and nuances of a person‘s unique facial anatomy. Lastly come the tertiary forms like sagging skin, wrinkles etc. After I complete sculpting the primary form, I immediately bring it into Maya to give it a nice topology using the modeling toolkit. It’s a constant back and forth between creating the elements and then bringing them to life with textures and shading in Arnold.
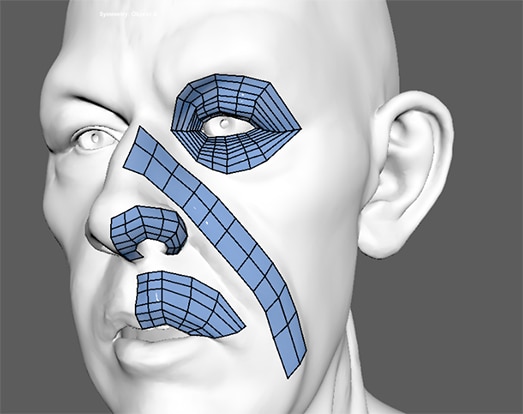
I try to keep as much of the primary forms intact from the topology that I’ve created in ZBrush when I bring the geometry back into Maya. This really allows me to use Maya to attack the details in the sculpture while streamlining a lot of the development process. Anything that I edit or tweak in Maya can be tested directly in Arnold, and I can see immediately if I’m happy with the level of detail for each element. The integrated workflow allows me to go back and forth at will until I’m happy with the result.
Skin
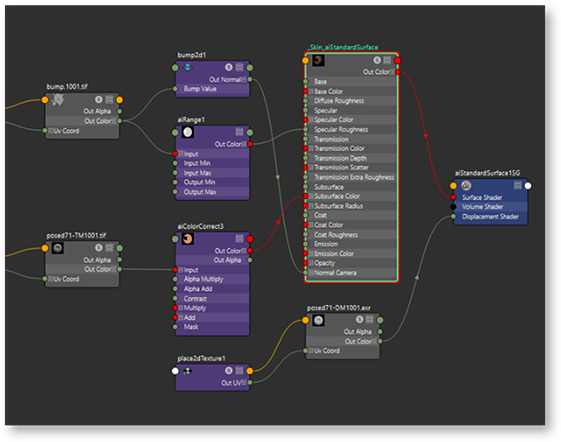
I primarily use the Standard Shader in Arnold because it’s so versatile. I can essentially make any material with it. The new random walk SSS Shader in Arnold 5.0.2 makes the details pop a bit more, especially in recessed areas around the nose, ears, mouth and eyes. It looks really natural and gets rid of that waxy, plasticky feel—which is obviously not what I’m going for in my photorealistic pieces.
One important tip is to really nail the reflectance of the skin. Breaking up the reflection/specular is very crucial. The tertiary details definitely help, but we need to go a level beyond that by having micro details that capture the structure of the skin.
With Arnold, having the ability to iterate as much as possible is key to success.
Hair
The one exception when I don’t use the Standard Shader is when I’m trying to create ultra-realistic hair. Arnold comes with a Standard Hair Shader that is marvelous. First, I comb through my reference library (pun intended) to find an example that I want to replicate. Then I use XGen in Maya to groom the hairstyle, using the Interactive Groom Splines to sculpt and design my guide curves. After that I use some of the inherent sculpting tools and modifiers like clumping, noise, cut etc. to deliver the final look.
Eyes
I am using two pieces of geometry that are layered one over the other. The first layer combines the sclera and iris while the second layer combines the cornea and conjunctiva. I then use the Standard Surface for all the shading. I completely negated my Diffuse and set the SSS Weight to maximum, and the painted Albedo Texture drives the sub surface color. The SSS Radius Color is set to a pale blue, which mimics the properties of the vitreous humor that fills the volume inside the eyeball. The Shader for the cornea and conjunctiva outer layer is a transparent material with an IOR of 1.336. I also applied a very subtle Bump Map that affects the conjunctiva portion of the geometry to help break up the specular in contrast to the cornea.
Colors and lighting
I like the portrait look, so I tend to go for various studio lighting configurations—a lot of area lights to simulate soft boxes and speed lights. I used mesh lights in this image to drive caustics on the eyes, because Arnold needs an actual object for ray-tracing. Arnold 5 mesh lights run so much faster than previous versions, and they’re fun to use. Basically, I used a basic three-point light set up. A rim light showcases all the scatter in the hair and ears. There’s also a key light coming from camera right and a fill light from camera left.
Start experimenting
As you can see, I’m a huge fan of being able to go back and forth between different modeling tools—and the new integrated workflows in Maya and Arnold enable that creative freedom. I can make model updates or add a lighting element and immediately get feedback into how it looks. It fits perfectly in my creative process as an artist.
Using the techniques that I’ve described in this article, along with Maya and Arnold, start experimenting with creating your own realistic CG characters. All you need to get started is the current version of Maya and my free 3D eye asset file. If you already subscribe to Maya, you’re all set. If you want to try Maya for free, click here.
About the author
Aviral Agarwal is a professional CG artist in Los Angeles. His goal as an artist is to become an effective storyteller.
Share this article: