Worldwide Sites
You have been detected as being from . Where applicable, you can see country-specific product information, offers, and pricing.
Keyboard ALT + g to toggle grid overlay
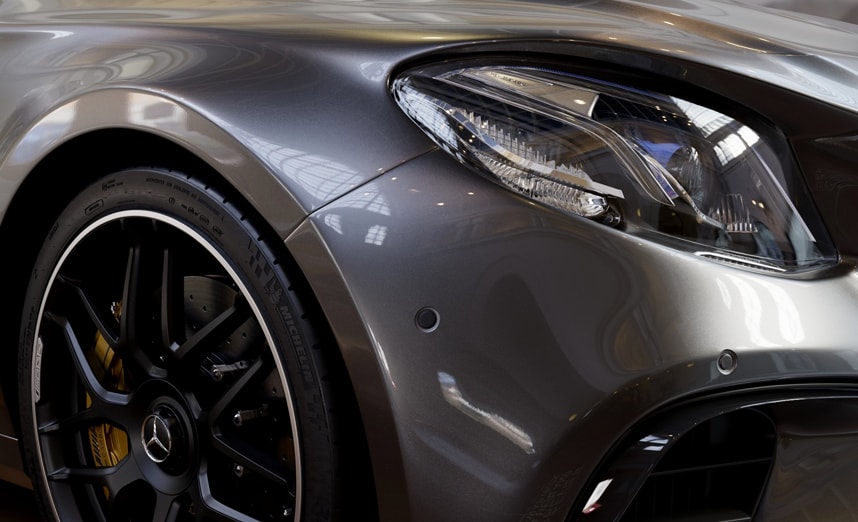
Arnold + 3ds Max
3D artists never know what could be coming through the door next. One day you’re creating a hyper-realistic, idyllic environment—the next you’re designing something from the stuff of nightmares with long, scratchy claws, a spikey tail and a massive overbite.
In addition to creativity and attention to detail, being flexible is an essential asset in this business as we often find ourselves creating many different assets from nothing. Having the right tools is key. I use 3ds Max and Arnold consistently because they give me the wide range of capabilities to tackle the breadth of projects I find myself taking on. They can literally do anything in the 3D visualization world, and they are easy to learn and use.
Under the hood
I’m actually a self-taught 3D artist with a background in architecture where I used AutoCAD and Revit. I started creating more complex 3D models and more lifelike 3D renderings using 3ds Max, and I just became enamored with the creative process. I loved that I could do anything I wanted by creating my own world and bringing my ideas to life.
Everyone has their own way of working, but I wanted to walk you through the workflow I used to create this 3D rendering of a car with 3ds Max and Arnold. My hope is that it helps inspire you to create something amazing.
The project
I’m often asked to create a rendering that looks and feels realistic enough to be used as an asset in a commercial or VFX pipeline. I’m sent a detailed 3D model in the form of CAD files created by manufacturers. If I’m lucky, I’ll also get a set of reference photos that show the model from different angles and distances. The best 3D models are shot in natural light. I’m typically sent a set of instructions for mood, tone, and overall feel that the client is trying to achieve. This all comes into play as I try out different shaders, textures, and lighting throughout the process.
Look development
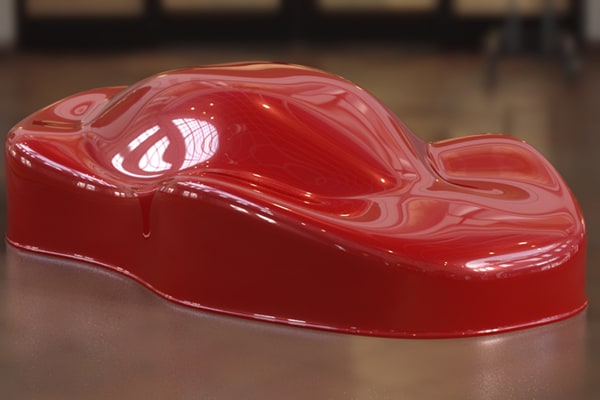
I typically bring the 3D model to a look development scene for creating shaders, but in this case, I decided to work on a 3D model of a Speedshape. First, I created a new scene by importing the object and adding an Arnold Skydome light—basically a physical camera that points to the model. I then chose an HDRI and assigned it to the Skydome light. Personally, I prefer an interior one with some strong light.
Another option is to use Template features in 3ds Max. You can create a new template with a Skydome light, and all the settings and UI features you want are saved for future use—which I think is pretty cool and handy.
Car paint
Cars have different surfaces, so it’s important to use different types of paint. In fact, a Car Paint shader was introduced with Arnold 5.0.2, making it easier to get that different look on various parts of the car.
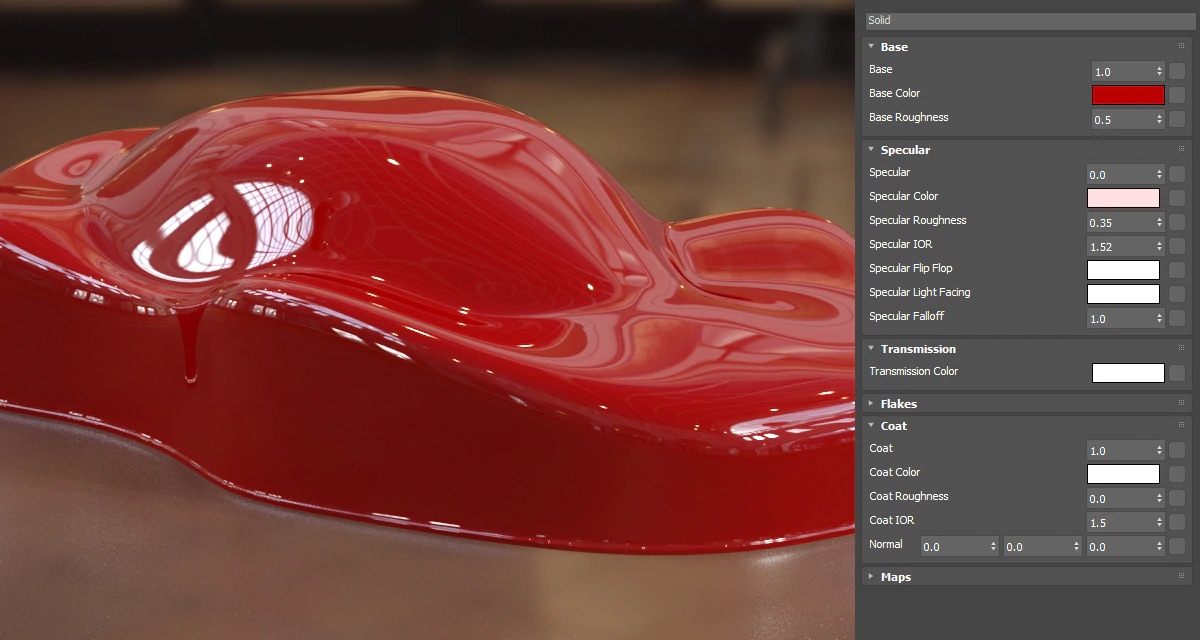
I started with the Solid car paint which is a base color layer of paint (specularity 0) with a clearcoat layer on top.
-
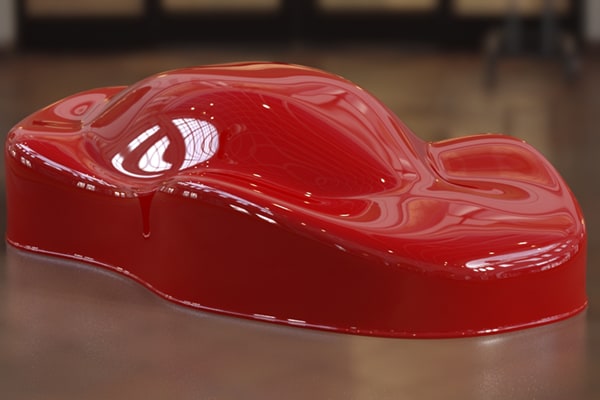
Solid
I started with the Solid car paint which is a base color layer of paint (specularity 0) with a clearcoat layer on top.
-
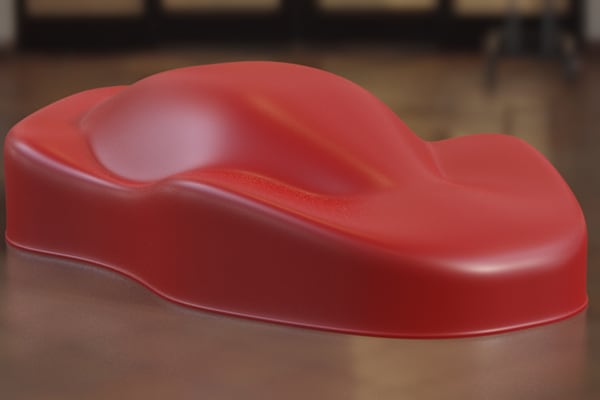
Matte
I then created a second Matte car paint which is the base color with some rough specularity (0.5 or higher).
-
Metallic
My third paint was Metallic car paint without flakes. I mostly use this style when I don’t have to worry about close up shots and I want to save render time. This is the base color with a specularity layer with a roughness of 0.25, and a clearcoat layer on top.
-
Metallic w/ flakes
I then created a Metallic car paint with powdered metal that has been added under the clearcoat layer. The amount, size, and type of metal added varies depending on the manufacturer.
-

Pearlescent
The last paint I created was Pearlescent – similar to metallic paint but with ceramic crystals called mica flakes that refract light, splitting it into different colors by allowing some light in and slowing it down as it passes through.


To get the desired effect, I used bitmaps for diffuse color and Bump.
Carbon fiber
Carbon Fiber reinforced polymer (CFRP) is an extremely strong and light fiber-reinforced plastic. To produce a carbon fiber, the carbon atoms are bonded together in crystals that are more or less aligned parallel to the long axis of the fiber as the crystal alignment gives the fiber high strength-to-volume ratio — a process that makes it strong for its size. Several thousand carbon fibers are bundled together to form a tow, which may be used by itself or woven into a fabric.


Rubber
For tires, I made a rubber material using a noise map as micro details for specular Roughness and subtle bump.


Scratched metal
For this shader, I created a metal and applied a normal map for scratches on it. To convert your scratch map to a normal map you can use NVIDIA Texture Tools for Adobe Photoshop if you have CS6 or lower. If you use Creative Cloud or a newer version there’s an option under filter menu in Photoshop.


Plastic (interior)
I used plastic for the steering wheel and dashboard. I looked up some reference photos for the actual car and I tried my best to match it. The important part was to choose the right map for bump and then the correct roughness. I then used the same bump map for the Specular Color value to get darker specular on the cracks of the shader.


Leather (interior)
The workflow for creating leather is more or less the same as for the Plastic shader, except I used less bump and specularity, and a smoother surface.
The car
Once all my materials were done, I was able to import the car into the scene. First, I assigned the shaders and scaled them using MapScaler modifier. I also could have used scale parameters on Triplanar node.
I then created the shaders for the car’s wheels. I created two different metal materials and added them to the rubber material that I created earlier. For sidewall tire texture I used Displacement. In MaxtoA, for Displacement, you select the object and add an Arnold properties modifier to it.
Quick hint: Enable Displacement and assign the map to the slot.

Tinted glass
Then it was time to cover the lights. For the headlights’ glass I applied a texture using Bump. The other parts got some chrome or mirror shader work. For the blinkers of the car I made an orange-tinted glass for front and red-tinted glass for the rear turn signals. For creating tinted glass you need to add the color you want to Diffuse and a lighter version of that color to the Transmission color. For specular bounces it depends on the scene you’re working on. If you want it to be brighter, add more bounces to it in the Ray Depth section in Render Settings. In this case 4 should be enough. It’s worth noting that I also added some base color to make it more realistic.

Lighting
For the final render I used a backplate with a matching HDRI and a distant light to boost the shadows for the lighting. I simply assigned the backplate to the Background under Environment and Effects. I then created a Skydome light and assigned the HDRI to it. I was careful to match the camera perspective to the backplate using the Perspective Match utility in 3ds Max. I also read the exif data (right click on the image and then select Properties) of the camera model which shot the backplate and used the information on DOF to get a more accurate match. Finally, I created a Plane under the car and assigned a shadow matte to it, so I could get the shadows. All I had to do then was to tweak the Skydome light setting until I got the look I was going for.
For studio lighting, I would recommend taking a look at this detailed tutorial.

Rendering
Rendering in Arnold is pretty much straight forward. First, I create AOVs for render and compositing optimization. If noise is present in the renders, you can use the AOVs to find the source of the render noise. If the noise is on the direct AOVs, you need to increase the light samples. If the noise is on the indirect Diffuse AOVs then you should add more Diffuse samples. For the noise on motion blur and depth of field, I was able to increase the camera AA samples.
Here is some helpful information on removing noise:

Denoising
Arnold has added two built-in denoisers, Noice (for high-quality final frame denoising) and OptiX (based on NVIDIA AI technology). OptiX is integrated into Arnold for use with IPR and look dev and can be applied to any AOV, but you need to have an NVIDIA GPU with a driver version of at least 390 installed. Both Noice and OptiX are time savers for for both artists and studios.
To use OptiX you just need to select the AOVs that you want to be denoised and check the box “Denoise with OptiX”.
To use Noice you need at least a main layer to be denoised (typically RGBA also known as “Beauty”) and a Variance layer that specifies the per pixel variance.
For better results, the recommended AOVs are Normal (N), Depth (Z), and Albedo (diffuse_albedo).
Start experimenting
Creating ultra-realistic 3D visualization is easy as long as you have the right tools. 3ds Max and Arnold give me the flexibility and control I need to create anything I want. They’re easy to learn and they have many built-in shaders, textures, materials, lighting and other components—saving you a lot of time. To explore more Arnold workflows, check out this extensive library of tutorials.
Using the techniques that I’ve described in this article, along with 3ds Max and Arnold, start experimenting with creating your own 3D car rendering. Download the free shader pack we’ve provided, import the shaders, and assign them to your car geometry, then play around to explore different looks. If you already subscribe to 3ds Max, you’re all set. If you want to try 3ds Max for free, click here.
HDRI and Backplates from HDRMAPS / Speedshape 3d model by Jeff Patton
About the author
Sina Mehralinia is a CG artist in Brooklyn. Feel free to contact him at [email protected].
Share this article: